In the rapidly evolving world of artificial intelligence (AI), having access to advanced AI models is a game-changer for developers, businesses, and tech enthusiasts alike. Whether you’re aiming to enhance your applications with cutting-edge AI capabilities, develop intelligent chatbots, or simply explore the vast potential of AI, obtaining an OpenAI API key is your gateway to this incredible technology. In this comprehensive guide, we’ll walk you through the process of getting your OpenAI API key, focusing on every detail to ensure a smooth journey. Specifically tailored for users of LinkyGPT AI Playground, this guide aims to empower you with the knowledge and tools you need to harness the power of OpenAI’s AI models.
Why Do You Need an OpenAI API Key?
Before we dive into the “how,” let’s explore the “why.” An OpenAI API key is not just a passcode; it’s a key to a treasure trove of possibilities:
– Access advanced AI models
OpenAI’s API provides access to revolutionary models like GPT-4, GPT-4 Vision, DALL-E, Whisper and many more, enabling tasks from natural language processing to code writing.
– Develop intelligent applications
Seamlessly incorporate AI into your apps, enhancing their functionality and user experience.
– Easy integration
OpenAI’s API is designed for straightforward integration, making it user-friendly for developers.
– Stay up-to-date
Automatically access the latest models and updates without any extra hassle.
– Scalability
The API is built to handle requests at scale, making it suitable for operations of any size.
– Cost and time efficiency
Leverage pre-trained models to save on costs and development time, maintaining high-quality results.
Step-by-Step Guide to Obtaining Your OpenAI API Key
1. Create an OpenAI Account
Navigate to the OpenAI “Sign Up” page, click sign up and fill out the form to create an account or use social login. Be prepared to provide some basic information about yourself.
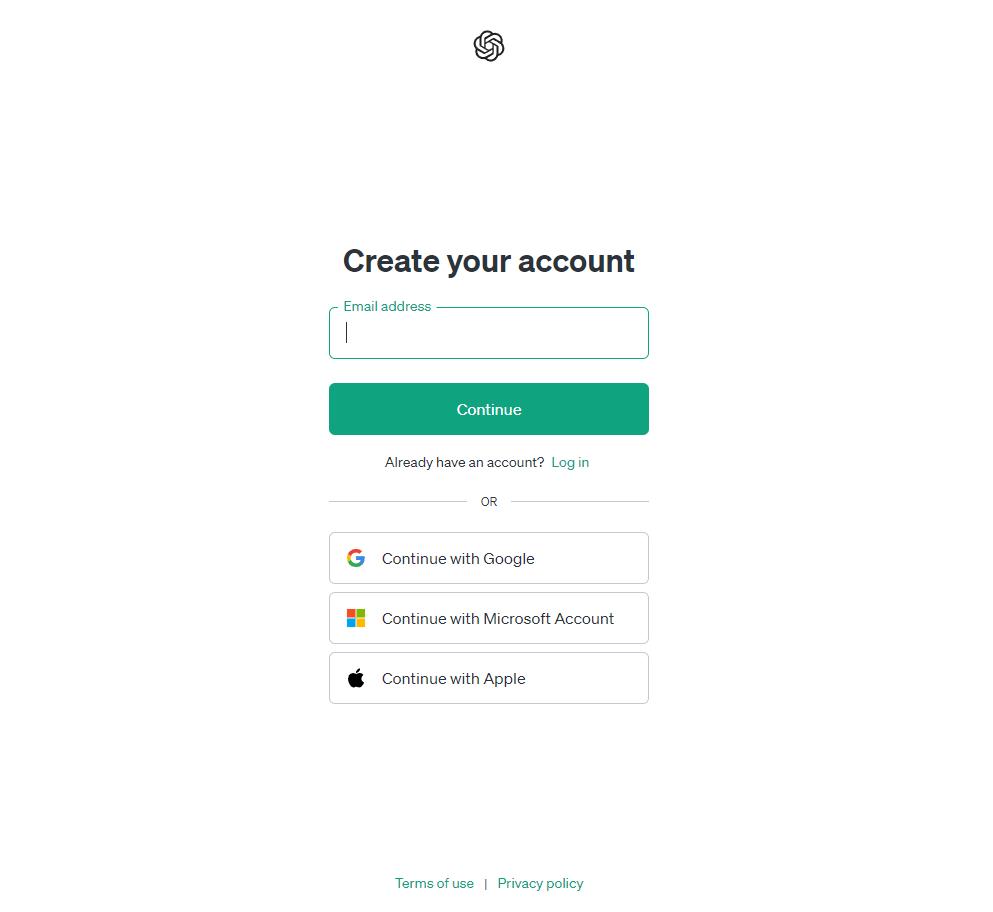
2. Verify Your Account
After signing up, check your email for a verification link from OpenAI. Click on it to confirm your account, ensuring its security and authenticity.
3. Log Into Your Account
Go back to the OpenAI website and log in using your new account credentials.
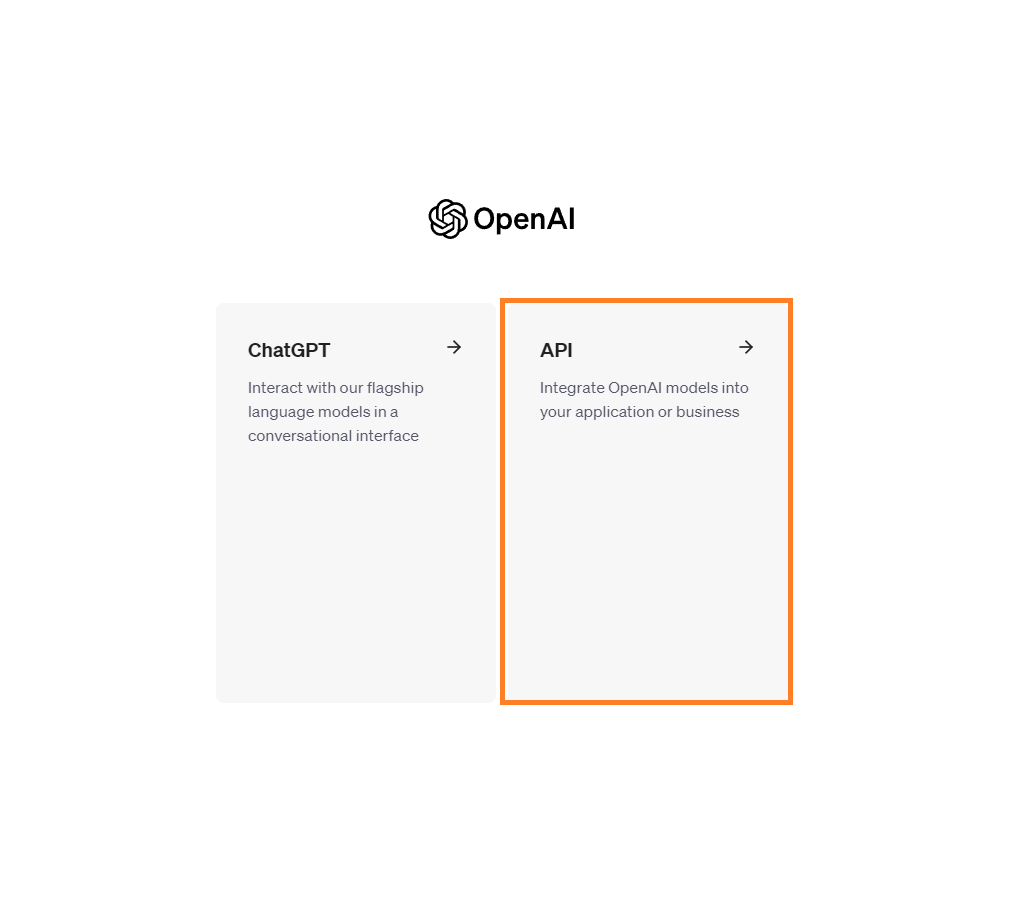
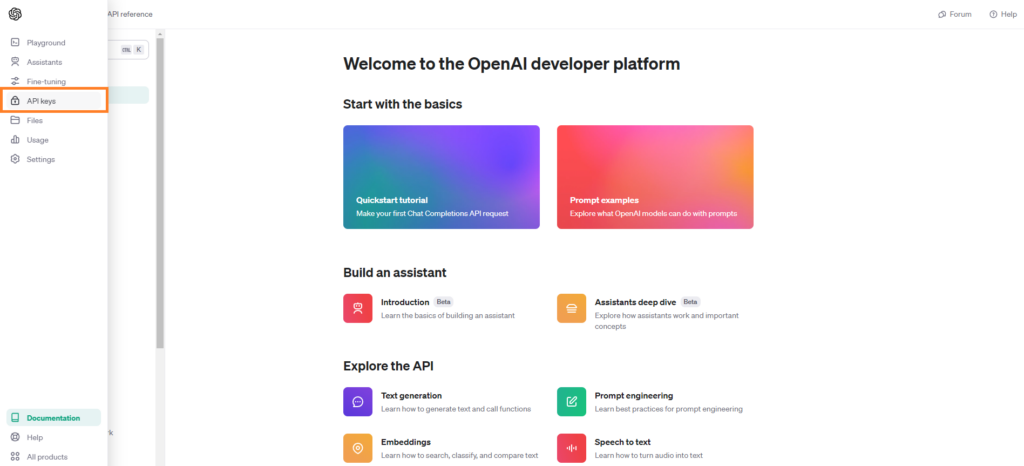
4. Navigate to the API Section
Once logged in, select API then find the icon or section for your API key settings, usually located in the left sidebar.
5. Generate a New API Key
In the API keys section, you’ll see an option to “Create new secret key.” Click this to generate your unique API key. Remember to name it appropriately, especially if you plan to use multiple keys for different projects.
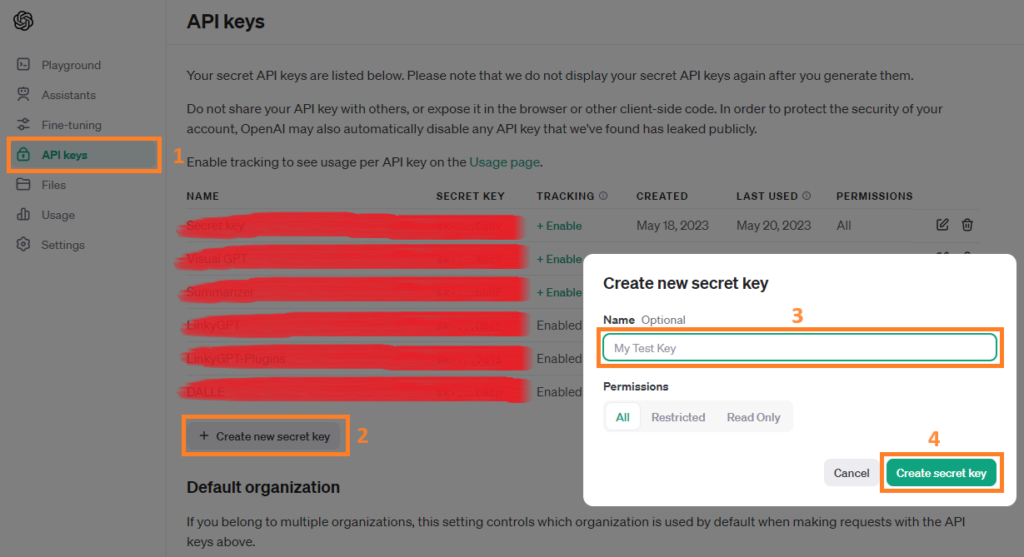
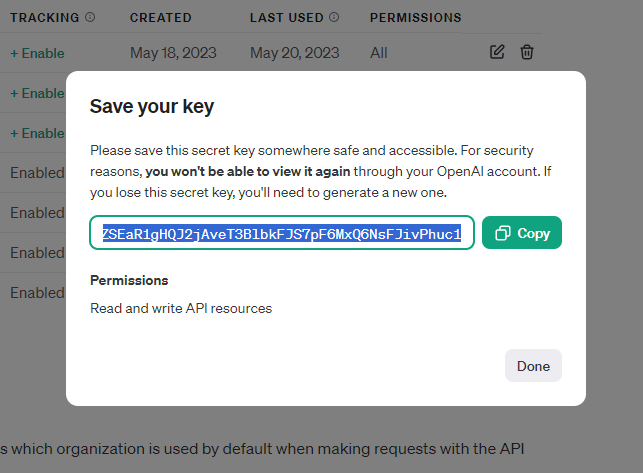
6. Save Your API Key
After generating, your new API key will be displayed. It’s crucial to copy and securely save this key immediately, as you won’t be able to view it again for security reasons.
7. Set Up Billing
Before you start using your API key, set up a payment method for billing to activate it. You’ll find the “Billing” option in the left sidebar menu, where you can add your payment details.
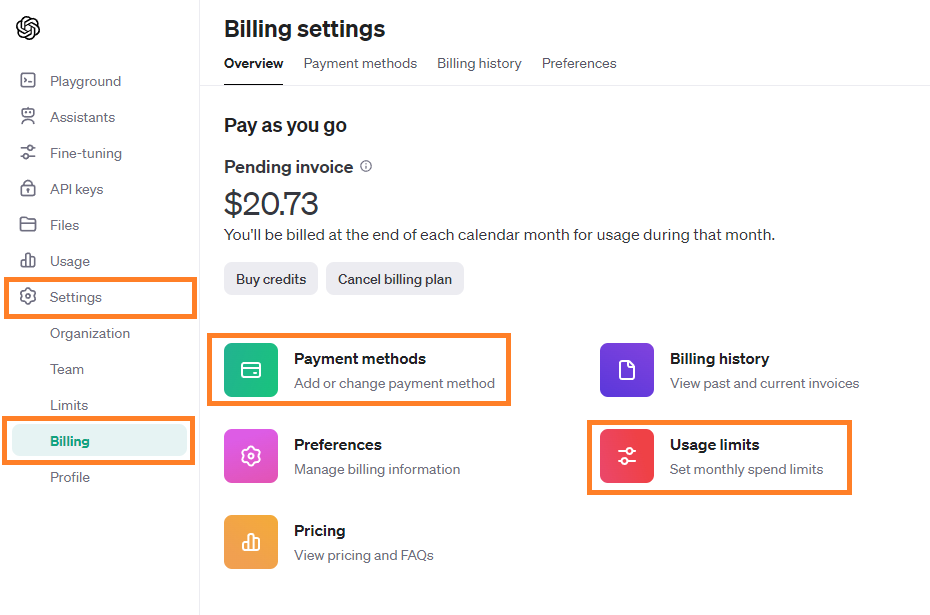
8. Set Usage Limits
To manage your spending, consider setting usage limits under the “Usage Limits” section. This step allows you to control your monthly expenditure on the API.
9. Compliance with Usage Guidelines
Lastly, ensure compliance with OpenAI’s usage policy and terms. Familiarizing yourself with these guidelines will help you use the API responsibly and ethically.
Ensuring Your API Key’s Security
– Use unique API keys
Assign different keys to different applications
– Do not share your keys
Neither with your team members or anybody else, but rather invite them to your organization to enhance security.
– Monitor account usage
Regularly check your usage stats and take action if you notice any discrepancies.
– Rotate your keys
If you suspect your key has been compromised, generate a new one immediately.
– Best practices
Follow OpenAI’s best practices for API key safety, such as using appropriate permissions.
Troubleshooting Common Issues
– Error Code 401 – Incorrect API Key
The error message you are receiving suggests that there is an issue with the API key used in your request.
• This issue could stem from multiple causes, including
- Typographical errors or additional spaces within your API key.
- Utilizing an API key associated with a different organization.
- Using an API key that has been either deleted or deactivated.
- Possible caching of your API key
• To rectify this error, consider the following steps
- Clear your browser’s cache and cookies, then attempt your request again.
- Verify the accuracy of your API key within the request header. Refer to our Authentication guide to ensure your key is properly formatted (example: ‘sk-…b9dp’).
- If you’re uncertain about the validity of your API key, consider generating a new one here.
Conclusion
By following this detailed guide, users of LinkyGPT and other developers can unlock the vast potential of AI by obtaining an OpenAI API key. This key is not just a token of access but a passport to a world where advanced AI capabilities can transform applications, enhance user experiences, and lead the charge in the AI revolution. Remember, with great power comes great responsibility; use your OpenAI API key wisely and in compliance with all guidelines. Welcome to the future of AI, where your next big innovation is just an API key away.
Finally, once you obtain your API tocken, check out this article on how to use it in LinkyGPT dashboard to gain access to all of OpenAI models.