In the rapidly evolving world of artificial intelligence, having access to a variety of AI models can significantly enhance your project’s capabilities. LinkyGPT, a cutting-edge AI assistant, stands out by offering a wide range of Large Language Models (LLMs) including OpenAI’s GPT-4, Google Gemini, Anthropic Claude, and many others. This article will guide you through the process of setting up API keys in LinkyGPT, ensuring you can unlock the full potential of this powerful tool.
What is LinkyGPT?
LinkyGPT is a free, open-source AI assistant that brings advanced AI models to your fingertips. It supports multilingual UI, multimodal chat, and a plethora of large language AI models for various tasks. With its user-friendly interface playground resembling that of ChatGPT, you can easily switch between models, adjust AI model settings, save/load custom presets, and even use plugins for enhanced functionality.
Getting Started with LinkyGPT
Before diving into the API setup, ensure you have created an account on LinkyGPT. You can sign up using your email or social account. Once registered, you’re ready to bring your API keys or explore the free models available on the platform.
LinkyGPT FREE AI Models
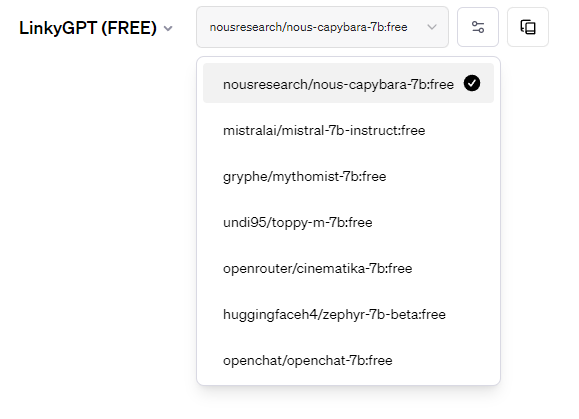
It’s important to note that not all models within LinkyGPT require an API key. The platform offers several completely free AI models that you can use without any setup. This is perfect for users who are exploring AI capabilities or working on projects with limited requirements.
How To use LinkyGPT free AI models?
1. Login to LinkyGPT dashboard.
2. Select LinkyGPT (FREE) from the upper model’s drop list.
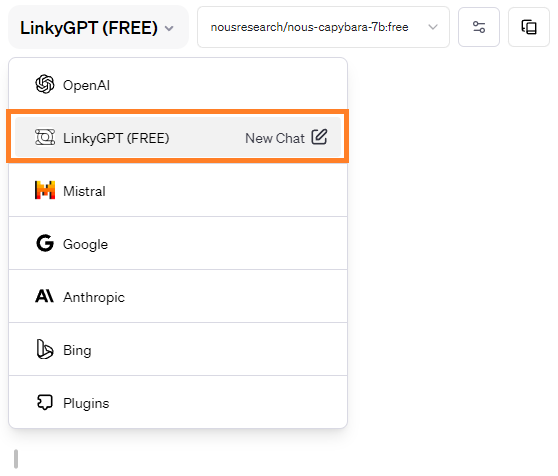
3. Select an appropriate AI model from the upper models droplist.
4. Enjoy your time 😀.
How To Get API Keys For Your Favourite AI Models
If you want to unlock the most powerful AI models, then you need an API access token from each provider. If you don’t have them already, please check the following step-by-step guides on how to get those API keys:
Setting Up API Keys in LinkyGPT Dashboard
Setting Up OpenAI API Key
1. Select OpenAPI as your provider
Navigate to the upper toolbar within LinkyGPT Dashboard. From the drop-down menu, choose ‘OpenAI’ as your API provider. Then click on ‘Set API Key’.

2. Enter the OpenAI API key
A popup window will appear, prompting you to enter your OpenAI API key. This key is essential for accessing OpenAI’s models, including GPT-4. Ensure your key is correctly entered and note that it will be encrypted for security purposes.
You also set the expiration date of the key, this is a recommended key rotation practice for improved security.
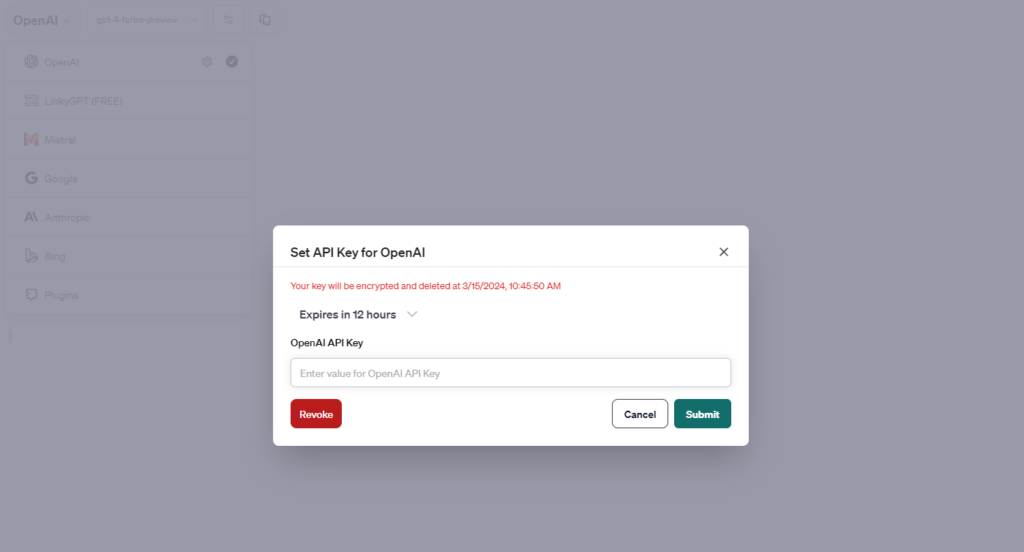
3. Click ‘Submit’ and you are all set to go
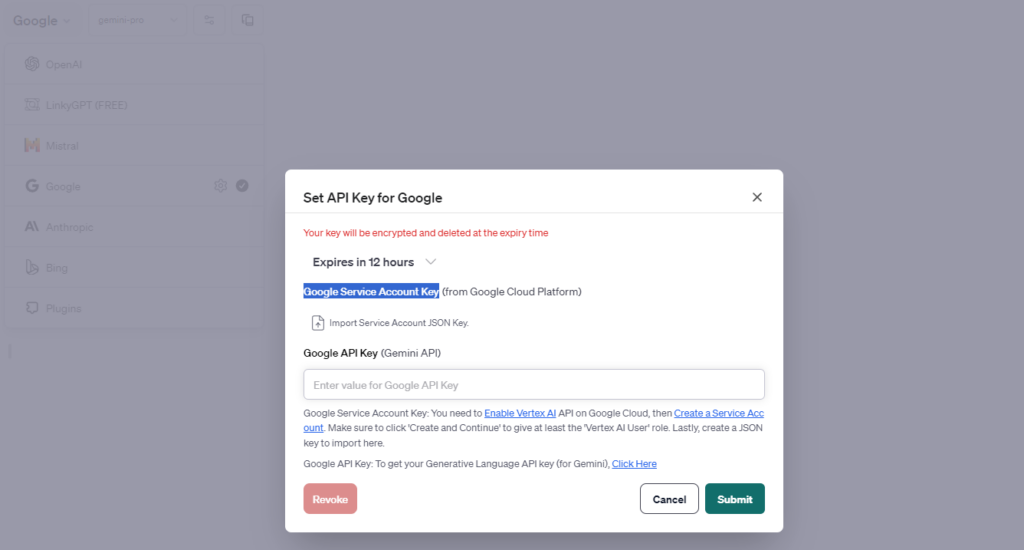
Setting Up Google API Key
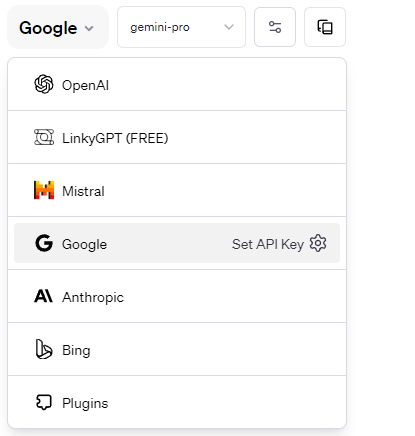
1. Select Google as your provider
Navigate to the upper toolbar within LinkyGPT Dashboard. From the drop-down menu, choose ‘Google’ as your API provider. Then click on ‘Set API Key’.
2. Enter the Google API key or your Google Service Account Key
A popup window will appear, prompting you to enter your OpenAI API key. It is important to distinguish between the different AI models Google provides. For activating Google Gemini models only, you need an API key similar to that of OpenAI. To get access to Google Vertix AI infrastructure which includes additional models such as PaLM API, Imagen, and Codey, then you need a Google Cloud service account JSON key.
Enter the key you have and click ‘submit’.
Note: You can follow a similar procedure for the remaining models.
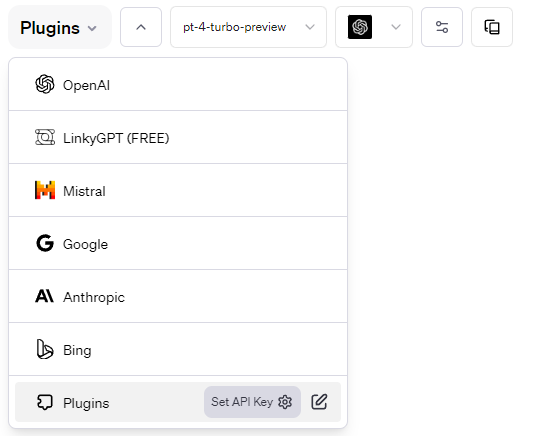
Setting Up API Keys for Plugins
LinkyGPT’s plugin store offers a variety of plugins that can enhance your AI assistant’s capabilities. Some plugins may require API keys to function correctly.
You can set up two types of API keys for LinkyGPT plugins, the first is an OpenAI API key that works as the master interface that interacts with all the store plugins through OpenAI models. This one can be set up simply by navigating to the models library, hovering over ‘Plugins’ as the model provider and pressing ‘Set API Key’.
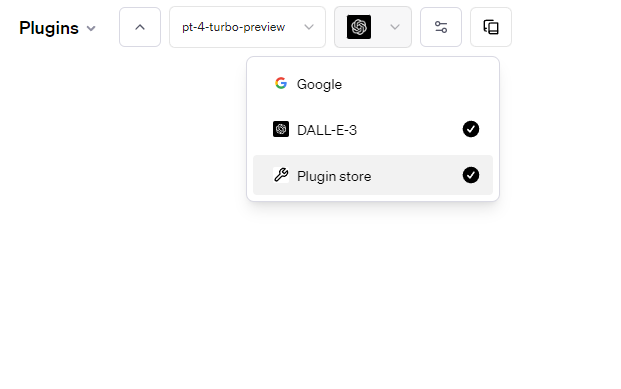
The second API is specific to individual plugins, to set it up you need to follow the following instructions.
1. Access Plugin Store
Navigate to the ‘Plugin store’ window within LinkyGPT. Go to the upper toolbar within LinkyGPT Dashboard. Make sure ‘Plugins’ is selected as your model provider. From the plugins drop-down menu, select ‘Plugins Store’.
2. Select a plugin from the store
Choose the plugin you wish to install, click ‘Install’ and note if it requires an API key.
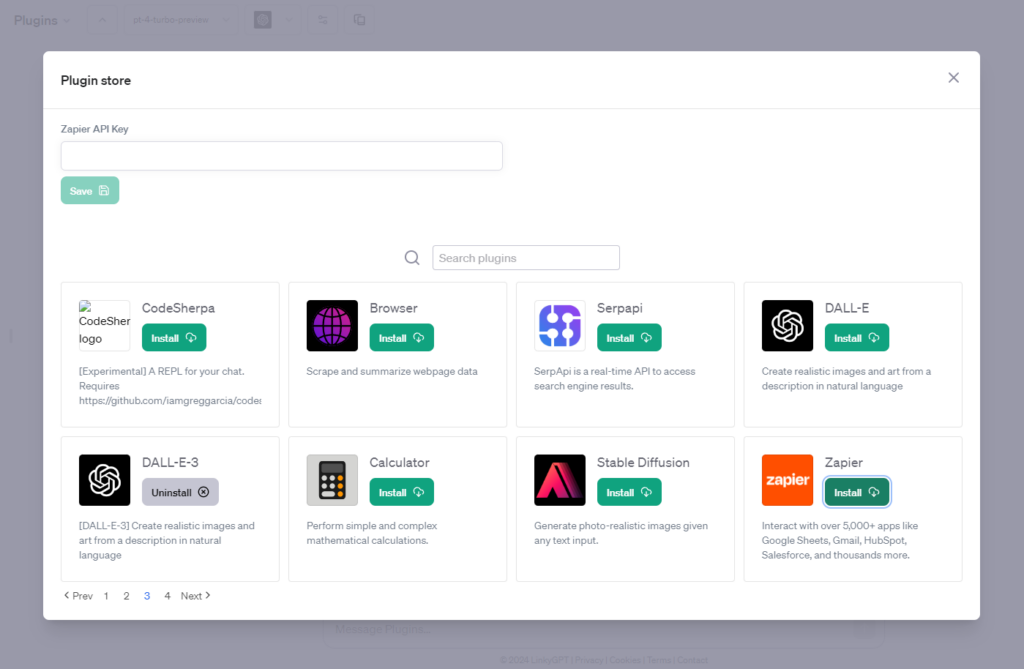
3. Enter your API key and click ‘save’
Conclusion
Setting up API keys in LinkyGPT unlocks a world of possibilities, allowing you to leverage a wide range of AI models and plugins. By following the detailed steps outlined in this guide, you can seamlessly integrate OpenAI, Google, and other services into your LinkyGPT experience. Whether you’re a developer, researcher, or enthusiast, LinkyGPT offers the tools and flexibility you need to create stunning AI-powered projects. Start exploring the advanced features of LinkyGPT today and step into the future of AI assistance.
Remember, the AI landscape is constantly evolving, and so is LinkyGPT. Keep an eye on the platform for new models, features, and plugins that can further enhance your AI projects. Happy experimenting!